
AI isolates the objects
Qwen Image Layered, a model run through fal, splits the image into 2 to 8 transparent RGBA layers, usually the subject, the background, and shadows or distinct objects.
This object eraser has no brush. AI splits your photo into transparent layers, usually the subject, the background and separate objects, and you erase an object by hiding or deleting its layer in any PSD editor.
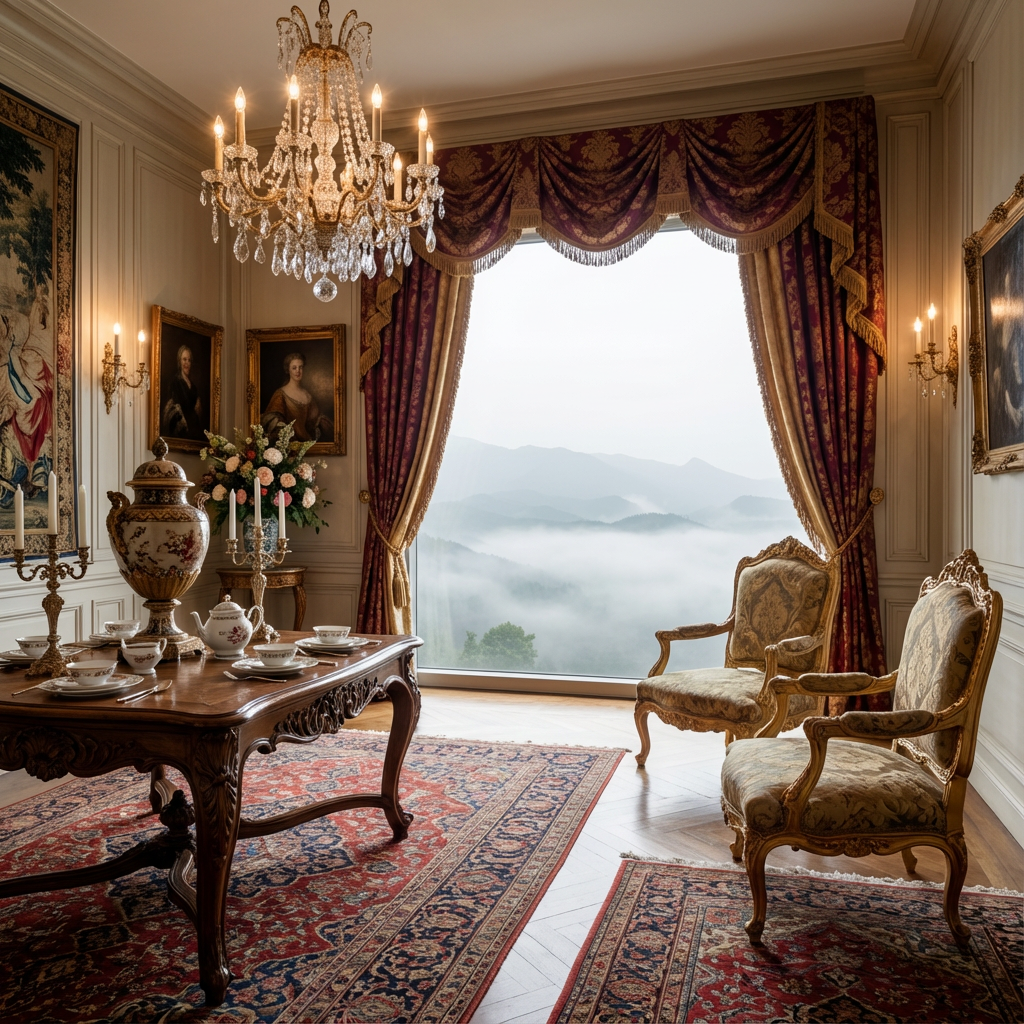 Original
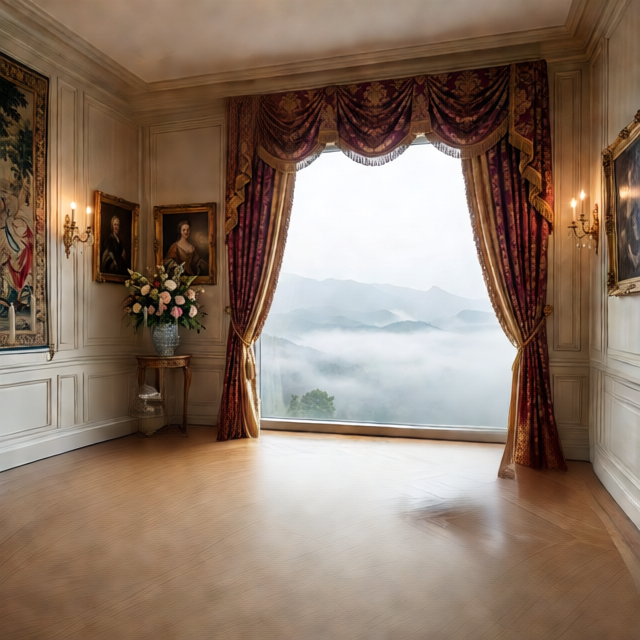 Layer 1
Click or drag an image here
Sign in to upload your image
Layer count
Free accounts can use up to 4 layers; subscribers get up to 8.
How it erases
A typical object eraser asks you to paint over something and then invents pixels to cover the hole, all on one flat image. This one separates the picture first. Each object the AI isolates becomes a layer, so erasing it means switching that layer off.
Qwen Image Layered, a model run through fal, splits the image into 2 to 8 transparent RGBA layers, usually the subject, the background, and shadows or distinct objects.
Open the layered PSD in Photoshop, Photopea, GIMP or Affinity and hide or delete the object’s layer. A hidden layer can be switched back on at any time, something a patch painted straight into the photo cannot offer once it is saved.
The background layer usually comes back with the area behind foreground objects filled in, so the scene continues where the object stood. Results vary by image, so inspect the preview first.
An AI object eraser takes an object out of a photo and fills in what was behind it. Brush tools do both on one flat image. This object eraser splits the photo into layers, with the fill usually already on the background layer, and leaves the final erase to you in an editor, where it can be undone.
Step by step
Using the object eraser takes three steps. Processing usually takes one to five minutes, a run costs 10 credits whatever the layer count, and credits for a failed run are refunded automatically.
Sign in and upload a JPG, PNG or WebP of up to 12 MB. Pick 2 to 8 layers; more layers give small objects a better chance of getting their own. Free accounts go up to 4, subscribers up to 8.
Look through the transparent layers and find the one holding the object you want to erase. Then export a layered PSD, or a ZIP of PNG layers.
Open the file in Photopea, Photoshop or GIMP, hide or delete the object layer, and export the finished image. Downloads carry no watermark.
What people erase
A layer-based object eraser is strongest when the thing you want gone is a distinct object with clear edges. These four cases fit that description most often.
A person crossing a landscape or standing behind your subject often lands on a separate layer. Hide it, and the path, sky or water on the background layer usually continues.
Chairs, lamps and side tables are solid shapes with clear outlines, which gives them a good chance of landing on a layer of their own.
Erase a stand, a prop or a second product while the main item and its shadow stay on their own layers, ready for a new backdrop.
Flat artwork and AI-generated scenes often separate cleanly, so you can erase a character or an object and reuse the rest of the composition.
Honest fit
Every object eraser predicts what the camera never recorded. The layer approach trades a little speed for control, and it has real limits worth knowing before you spend credits.
This object eraser does best with people, furniture, vehicles and props that stand apart from the background. You can erase several of them from one export and bring any of them back later.
Dust, thin wires, small text and anything sharing its colors with the background often stay merged into another layer. With no brush in the app, those need a touch-up in your editor.
Layers come back at the model’s working resolution: a 1024×1024 upload returned 640×640 layers. There is no upscaling, so it suits web, social and listing images better than print.
Limits and answers
It is a tool that takes an element out of a photo and fills in the area behind it. Most tools paint that fill onto a flat image. This object eraser separates the photo into layers instead, with the fill on the background layer, and lets you do the erasing in an editor.
A brush-based object eraser, like content-aware fill in Photoshop, changes the pixels of one flat image around your selection. Here nothing is painted: the AI decides how to split the image, you pick the layer to erase, and every other layer stays intact in the PSD.
For dust, small blemishes, thin wires and text baked into a photo. Those rarely get a layer of their own, and a brush-based object eraser in your editor handles them quickly. Use this object eraser for distinct objects you may want to bring back later.
In any editor that opens a layered PSD: Photoshop, Photopea in a browser, GIMP or Affinity. There is no in-browser layer editor on this site: the object eraser splits the image and exports the file, and your editor handles the erase.
Yes, as long as you hid the layer instead of deleting it and kept the PSD. Switch its visibility back on and the object returns exactly where it was. Keep the original download as a backup before you flatten anything.
The background layer usually has the area behind foreground objects already filled in, so the scene carries on where the object stood. The fill is predicted rather than recovered, so check edges and patterns at full zoom before publishing.
Shadows are often split onto a layer of their own, and sometimes they stay in the background layer. Hide the shadow layer along with the object; if the shadow is baked into the background, soften it with your editor’s own tools.
Often, yes. People and animals are distinct shapes and tend to separate well, though a group standing close together may come back on one shared layer. Only erase people from photos you have the right to edit.
Yes. The object eraser often splits flat artwork and AI images from tools like Midjourney or Stable Diffusion cleanly, because their shapes and colors are well defined. Painted textures and heavy effects can blur the boundaries between layers.
No. Whatever fills that area was predicted, not recovered, because the camera never recorded it. Treat the filled background as a plausible guess and never as evidence of what was really there.
It is free to try. Each run costs 10 credits whatever the layer count, failed runs are refunded automatically, and downloads have no watermark. Credit packs and subscriptions are on the pricing page.
Upload a JPG, PNG or WebP of up to 12 MB. You get a layered PSD or a ZIP of PNG layers at the model’s working resolution, so a 1024×1024 upload returned 640×640 layers. There is no upscaling.
No, there is no mobile app. The object eraser is a website you use in a browser, and the final erase is easiest in a desktop editor or in Photopea on a larger screen.
Uploads and generated layers are stored in cloud storage so you can preview and download them. Check the privacy policy before uploading anything confidential.
Sign in, upload a JPG, PNG or WebP, and the object eraser splits it into transparent layers you can hide in Photopea, Photoshop or GIMP. A run costs 10 credits, and failed runs are refunded automatically.